Today's card was created for the...
Soul Scrappers November Christmas Card Challenges.
Soul Scrappers is a private group on Facebook. It's very easy to become a member. Once you join, you can view all the awesome projects and you can also participate in our monthly challenges. Each month there are six challenges along with prizes offered to one random winner for each of the challenges. If you're a scrapbooker, this is the place to be and a great way to get those photos scrapped!
Each November, along with our regular monthly challenges, we also have six Christmas Card challenges. This is a great time to get those cards made!
Please consider joining Soul Scrappers on Facebook to view all the inspiration!
The 2nd Christmas Card Challenge I'm hosting, as a member of the Design Team, is to add a "Christmas Bird" on your card.
Here's what I created using the Stampin' Up! Perched in a Tree Stamp Set, Aspen Trees Dies, Stylish Shapes Dies and Deckled Circles Dies along with Snowflake Sky 3D Embossing Folder and Joyful Specialty DSP.
For my card base, I used Cherry Cobbler cardstock.
The beautiful Joyful Specialty Paper was embossed using the Snowflake Sky 3D Embossing Folder and adhered onto the card base with dimensionals.
The bird was stamped using Memento ink and colored using Smoky Slate and Pumpkin Pie Stampin' Blends Markers, die cut and adhered with dimensionals.
The circle behind the bird was die cut using Deckled Circles Dies.
The branch was stamped using Pecan Pie ink onto Pecan Pie cardstock and die cut using the Aspen Trees Dies.
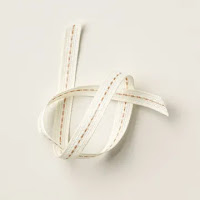
To achieve the fine strands behind the tree branch, I cut a piece of the Real Red & Gold Dotted Ribbon and pulled fibers from the ribbon, including some of the gold fibers to adhere behind the branch.
Two different embellishments were added on my card: Adhesive-Backed Snowflake Assortment and Adhesive-Backed Glitter Sequins. I layered three of the snowflakes with the glitter sequins and also added two glitter sequins around the sentiment.
The ribbon was also wrapped around the bottom portion of the card and held in place with Mini Glue Dots.
The sentiment was stamped using Versamark ink and heat set with Gold Embossing Powder and die cut using Stylish Shapes Dies. I mat the sentiment onto Basic White cardstock before adhering with dimensionals.
Specialty DSP was also added on the envelope flap.
Inside my card is Basic White cardstock with a strip of DSP and ribbon along the right. The sentiment was stamped using Cherry Cobbler ink.
Thanks so much for stopping by my blog today.
*************************************************
I would love it if you would SUBSCRIBE to my BLOG.
Also, click on the "Home Button" at the end of this post to take a look at my other projects.
You can follow me on Pinterest, Instagram and my Facebook Business Page.
***************************************************
There's a NEW card kit in the Stampin' Up! Kits Collection!
It's called, "The Best Destination" Kit.
Plan a crafting getaway today with the all-inclusive The Best Destination Kit!
This kit lets you make nine tri-fold cards with a colorful, nostalgic, travel vibe. Resort-hopping was never so easy!
Purchase your kit HERE.
***********************************************
New products have been added in the Online Exclusives in my Online Store.
Below are photos of the newest products available. Keep in mind you will not see these products in any catalog. They are only available Online and while supplies last.
Simply Sparkling Bundle
Of Art & Texture Stamp Set
Feathered Flight Stamp Set
Garden Meadow Bundle
Adhesive-Backed Dragonflies & Birds
Pecan Pie Center Stripe Ribbon
Meandering Meadows Suite Collection
Fluffiest Friends Bundle
Softly Said Stamp Set
*************************************************
Subscribe to Paper Pumpkin and receive a cute little box each month delivered right to your door. These cute little boxes are filled with everything you need to create beautiful cards or 3D projects.
The December Paper Pumpkin kit is called: "All The Best."
This kit comes with everything you need to make nine cards.
The theme focuses on sending wishes of hope and encouragement to those you love.
In this kit you'll find bright blues and yellows, hand-drawn floral designs and gold foil details. It also comes with an acetate box for you to store your finished cards and envelopes. Simply decorate the box with the bellyband, stamp a sentiment and top it off with embellishments. Gift the box of cards to a loved one and they can then gift a card to someone else. It's the gift that keeps on giving!
Subscribe by December 10 for your Paper Pumpkin kit HERE.
****************************************************
Refills are available for LAST MONTHS Paper Pumpkin Kit - "Home for the Holidays"
You must be a Paper Pumpkin subscriber to order Refills.
Be a Paper Pumpkin subscriber and get your refill kits!
Subscribe to Paper Pumpkin HERE.
**********************************************************
**********************************************************
Click on the image below to get your FREE Project Tutorial.
***************************************************
If you have any questions, feel free to pop me an email at libbyscraftstudio@gmail.com.
* Shop Online Exclusives - CLICK HERE
* Purchase the "Rustic Christmas Countdown Kit" - CLICK HERE
* Shop Branded Merchandise - CLICK HERE
* Subscribe to Paper Pumpkin by Dec. 10th - "All The Best Kit" - CLICK HERE
* Have a big WISH LIST? Join My Team - CLICK HERE
* Shop the Clearance Rack - CLICK HERE
* Shop the Kits Collection - CLICK HERE


No comments:
Post a Comment
I love reading your positive comments.